Welcome to my little corner on the web. I want to share with you projects I make and at times share how easy it is to copy! Yes you are to copy any and all you see here, some you'll like and some you may not care for but I hope that won't send you away for good. Let's have a GREAT time stamping and creating.
Thursday, December 6, 2012
this card had many different tecchniques: 1. the red section of the background is marbled with silver shimmer paint and alchol with the cherry cobbler color. this is applied with a cotton ball. put the alcohol on the cotton ball then add drops of the paint on the cardstock and the reinkers on the cotton ball.. dab and twist on the glossy card stock to give a marbled look, this can be done with two are three different colors and the silver, gold, or bronze. 2. the embossed setion on the front was colored with the silver shimmer paint. using a light hand put some of the paint on a cotton ball and LIGHTLY rub over the raised section to give a silvery look.(this was not glossy card stock) 3. Cut the front green piece with one of the dies from the framelits then embossed with the oval from the designer frames. Cut the designer piece with the apothecary die. Stamped the circle and JOY from the Joyous Celebrations Stamp Set (holiday mini) Finished of the card by adding a pearl to each side of the JOY on the DSP .
Christmas Cards
Stampin' Ups new ornament stamp set and die, Illuminate stamp pad rubbed on the embossed portion of the card to give it a little more texture.
Friday, November 30, 2012
Wednesday, September 26, 2012
sunrise
 Embossed the leaves with black then colored with markers layering the colors and blending them so the leaves didn't all look the same. Sponged the sunrise colors into the background sorta being careful to not go over the leaves but nothing showed up in the areas where it did. Now I need to do this with some fall colored leaves. thanks for looking.
Saturday, September 22, 2012
wedding gift package
Wednesday, September 19, 2012
Sponged butterfly
 Easy card to make here's how: 1. cut a stencil from the beautiful buterflies die (or any shape you want to use)
2. Lay the piece that has the shape cut out of it(your stencil) over your cardstock and using sponges apply the color starting at the bottom, each time you add a new color overlap the previous color so the colors blend nicely.
3. take your stencil off and then use your sponged image on your card in the desired way. I put mine through the big shot with an embossing folder it give it some texture.
4. Added a gray layer behind the sponged image then wrapped this with the ribbon.
5. Put on the card base - 5 1/2 x 4 1/4 folded in half. you could add a word saying in the midde of the butterfly. Thanks for looking
Thursday, September 13, 2012
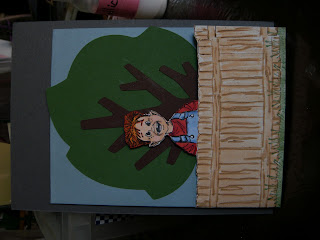
Front and Backs with Copic's
Colored with my copic markers all but the grass area. Doesn't that little boy look ornery?
Wednesday, September 5, 2012
Thursday, August 30, 2012
Turn the simple into the complex but it's EASY!!
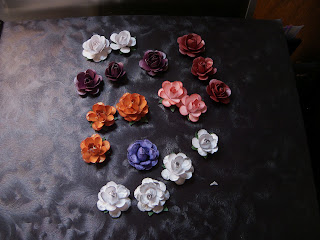
 Okay this is the simple, just a 5 petal flower bought at JoAnns the next picture shows the two different sizes and the small complex finished project. Why buy roses when you can make them?!!!??
Tuesday, August 28, 2012
Sept class Cards
Well I finally learned how to use my sons camera so for now I'm back up and running. These were not original to me but saw them and thought they were just what I needed for the class at the apartment.
Wednesday, August 22, 2012
canning season
haven't posted for a loooong time, vacation and canning season. well my camera isn't working either so that doesn't help. hope you'll look again sometime.
Wednesday, July 18, 2012
Use up those old Jeans!!
- I decided to post this since my camera if not working and I can't download anything new One I made into a headband and the other has a pin on the back. Island Floral Die
Tuesday, June 26, 2012
Saturday, June 23, 2012
Post - it -note holder
Friday, June 22, 2012
serene lake
I decided I wanted to do a little sponging and create scenic card.
1. first I used the brayer to lay down a light coat of bashful blue
2. I then used a post it note to mask off the lower part of the card and sponged some so saffron and a little sahara sand close to the post it note.
3. used a sponge dauber to add just a little basic gray to the edge of the post it note
4. removed the post it note and ripped a little off both sides to crealt the hills, then put post it not on covering the sky and sponged in the basic gray for the hills.
5. added a little more blue to the water and some gray
6. used the white uniball and basic gray marker to add some waave lines in the water
7. stamped the leafy looking stamp on the bottom then sponged a little basic gray for depth
8. layed and decorated the card to finish
Hope you like this my very FIRST post have a great day!!
Subscribe to:
Posts (Atom)
Layers of Beauty
Fun, fun, fun! Another new stamp set bundle, this one is called layers of beauty bundle. It has a stamp set, dyes, and decorative masks to ...

-
SIBH= Stamping Inkspirations Blog Hop Yep it's that time again, our Feb. Blog Hop with what else but a Love theme! I have two really di...
-
A new year and a new blog hop the second Saturday of each month. This is going to be so much fun and I am so hoping I can do this every m...
-
Oh hello, I'm so happy to be hopping again this month! Thank you for stopping by, I hope you like my project. I decided that our...

 Made this card a few years ago


 Well I tried to turn the front of these 2 cards but couldn't figure it out sorry.


